
Cheap Change Installment Four
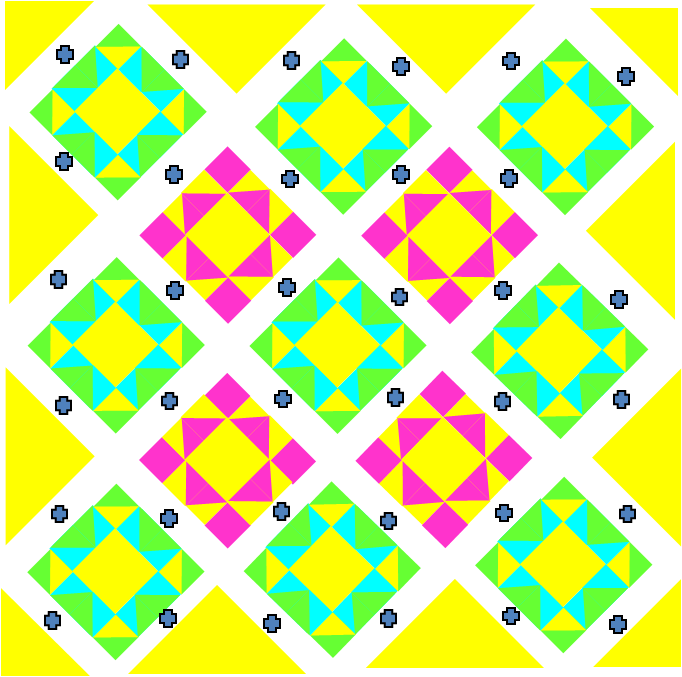
Assembling the center: (Uses (4) Unit V’s, (9) Unit VI’s, (8) Color A triangles cut from 12 5/8 inch squares and (4) Color A triangles cut from 6 5/8 inch squares.)
First, sew together diagonal rows arranging the Unit V’s and Unit VI’s according to the diagram. If you pressed according to earlier steps, they will all nest together (it may be necessary to rotate the blocks). Recommend starting with the longest center row—this will determine the orientation the blocks of the following rows. Press towards the Unit VI’s.
At the end of each row, sew a Color A triangle cut from the 12 5/8 inch square, being careful to keep the straight of grain and bias oriented like the diagram. Press towards the Unit VI’s.
Lastly, sew the Color A triangles cut from the 6 5/8 inch squares after all the blocks are in rows and then the rows are sewn together. Press towards the Color A triangles cut from the 6 5/8 inch squares.
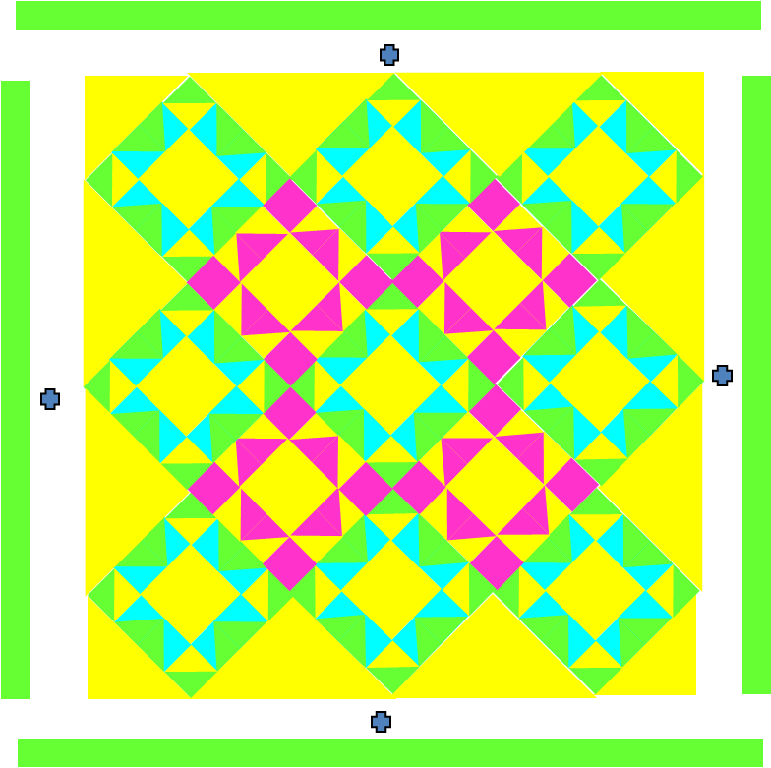
Sew the Color B 1 ½ inch by 34 ½ inch borders to either side of the center. Press towards the border. Sew the Color B 1 ½ inch by 36 ½ inch borders to the remaining sides and press towards the borders.
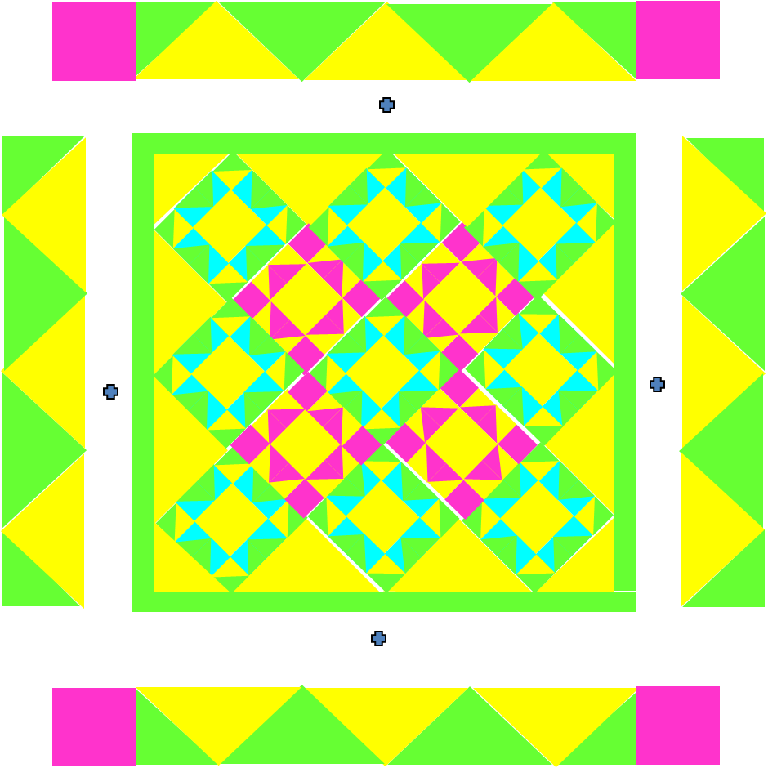
Adding the second border: (Uses the center with the first borders attached, (4) Color C 6 ½ inch squares and (4) Unit BBABB’s.)
Add the Color C 6 ½ inch squares to either end of the remaining Unit BBABB’s, according to the following diagram.

Press towards the Color C squares. Set aside—these will be used in a future step.
Final assembly: (I know those are words you’ve been waiting to read!!)
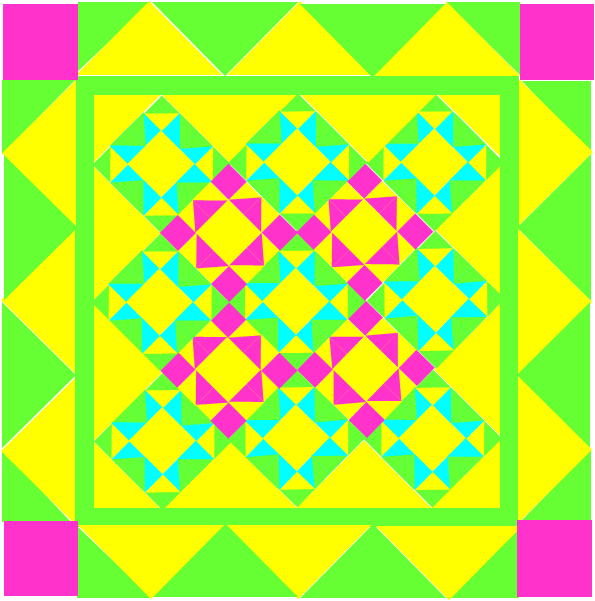
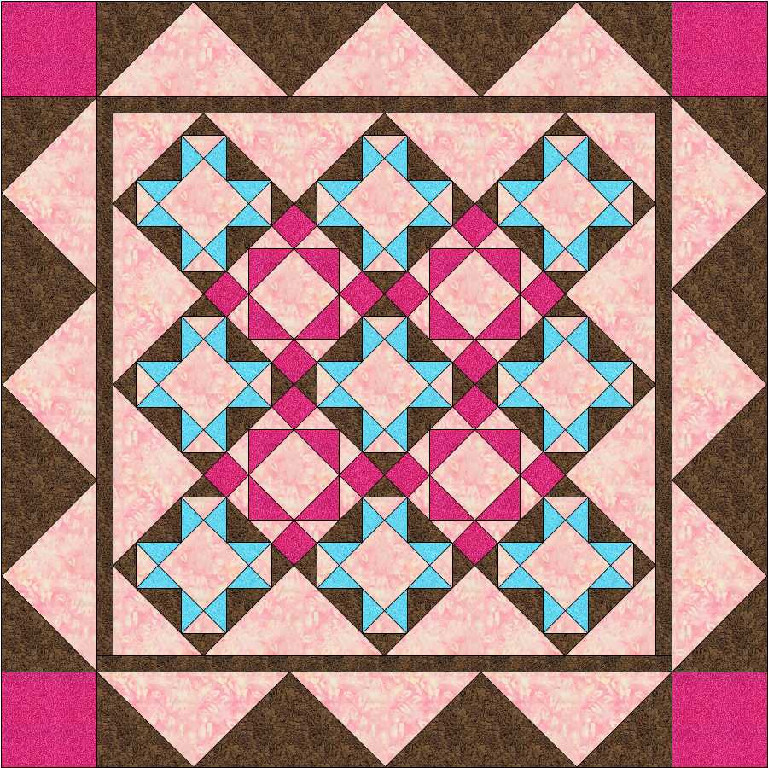
Being careful to orient the Unit BBABB’s according to the diagram, sew one each on opposite sides.
Press towards the first border. Add the final two Unit BBABB’s, careful to orient according to the diagram. Press towards the first border
Congratulations!! You’ve completed the mystery “Cheap Change!”
Click here for a printable version of this page