
Cheap Change Installment Three
Assembling of Unit V: (Uses (4) Unit I’s and (8) Unit IV’s)
Assemble Unit V according to the following diagram, making sure to orient the flying geese units the same way:
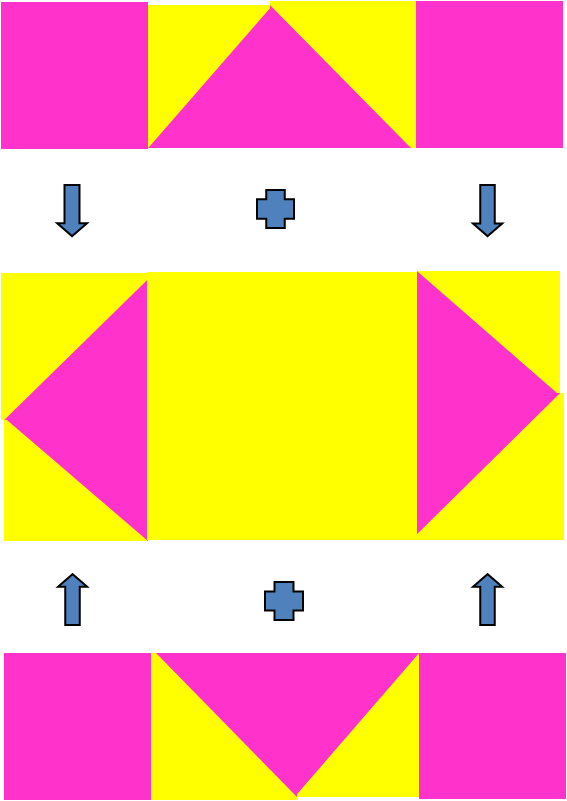
Press towards Unit I. You should have (4) Unit V’s.
Assembling of Unit VI: (Uses (9) Unit II’s and (18) Unit III’s)
Assemble Unit VI according to the following diagram, making sure to orient the flying geese units the same way:
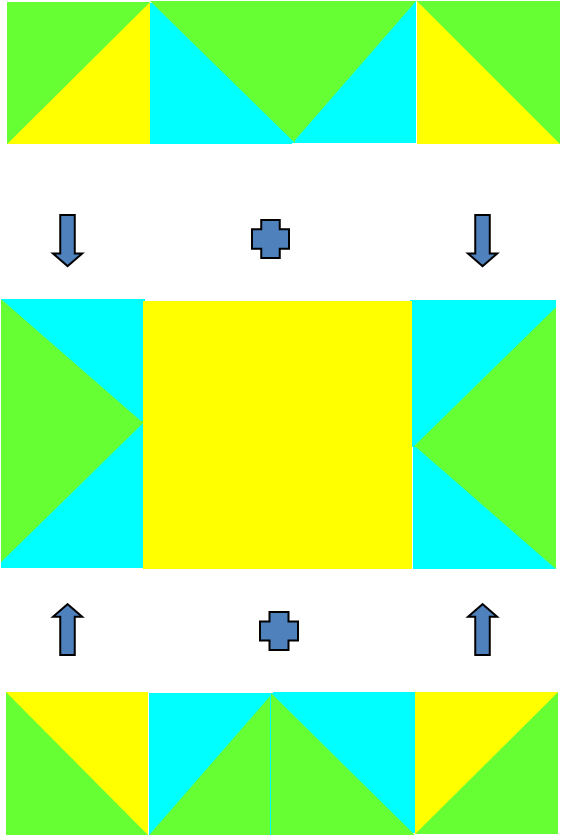
Press towards Unit II.
You should have (9) Unit VI’s.
Assembling of Unit BAB: (Uses the (12) Color A triangles cut from the 13 ¼ inch squares, (8) Color B triangles cut from 13 ¼ inch squares and (8) Color B triangles cut from 6 ? inch squares) Note: Arrow indicates straight of grain.
Line (3) Color A triangles and (2) Color B triangles as follows, making sure the straight of grain and bias edges are oriented the same way:

Putting right sides of consecutive triangles together, off-setting the edges by a ¼ inch, like the following diagram:
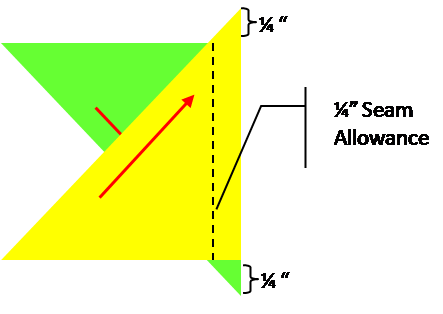
Repeat to make four Unit BAB’s, looking like the following diagram:

Trim, leaving a ¼ inch at points.
Assembling Unit BBABB:
To each Unit BAB, add a Color B triangle from the 6 ? inch cut square to each end according to the following diagram:

You should have four Unit BBABB’s at the end of this step.
Congratulations!! You’ve completed all the units for the mystery “Cheap Change!” Next week the mystery will be solved and you’ll have created an entire quilt top in one month. Put your feet up and bask in the glow of a job well-done!
Click here for a printable version of this page.